Thursday, April 12, 2012

My New Mermaid is Called Symphoni! Congratulations to BreAnna!

Thank you so much to everyone who participated in my naming contest for my new mermaid piece! There were so many good suggestions and it was definitely a tough choice.

I decided on the name Symphoni suggested by BreAnna. I don't know if anyone else ever experiences this when they look at a piece of artwork, but I will try my best to put into words what I feel! Sometimes, when I look at a piece of artwork, for lack of better words, it sings to me. It doesn't happen very often and sometimes it's with my artwork or sometimes with another artist's work, but it's just something about it that sings! I think it has something to do with the balance, flow and composition of the piece that almost creates a visual harmony if that makes any sense. I experienced that with this mermaid piece very strongly when I finished it!

So when I saw BreAnna's suggestion and she said it reminds her of the music of the sea, I just knew that Symphoni was the perfect name for this piece. So congratulations BreAnna and thank you for your suggestion! You will receive a 5x7" print of the finished piece. =)

Thanks again to everyone who suggested names! I will be having more naming contests very soon. Actually tomorrow, if I have time, I will be posting another one. So be on the lookout for that!

Also, here is the finished line work for Symphoni! I hope to start painting her sometime next week. =)

How to Create Clean Line Work in Photoshop

So you have this awesome sketch that you want to turn into a final painting, right? But you have no idea how to create nice clean line work from your messy sketch. Well, I'm here to help!

I have struggled with this same issue myself. I am a watercolor painter, so having clean line work is essential before beginning on the painting. Being an extremely messy sketcher, erasing lines over and over again, drawing directly on my watercolor paper was never an option. I found that I tore up the fibers of the paper which made painting on it a nightmare. Also, I have never cared much for leaving graphite on the paper and then painting with watercolors on top. If you're not careful, this can make the colors look muddy.

So when faced with this problem initially, I went through all the standard solutions. I tried graphite tracing paper. This was messy and I could never quite get my sketch to look the same way on the final paper. It was also quite time consuming.

I have also tried a light box and a projector to get my lines on the paper, but again you're leaving graphite directly on the paper which I'm not crazy about. Some artists do very well with this technique, but it has never been for me.

After trying and discarding all techniques to get my line work onto my final watercolor paper, I became very frustrated! Then it occurred to me that I have knowledge of Photoshop and know how to create nice clean line work in Photoshop! So I started creating my line work in Photoshop and then I print my lines very lightly onto my final watercolor paper. I run my watercolor paper right through the printer. It works fabulously! I then ink over the printed lines and paint from there. I have been using this technique for years and it's the cleanest, best technique that I have found.

Also, the added bonus is that you have a super clean digital black and white line version of your artwork. If you sell your work, there are many different uses for this black and white version. An obvious use of it is to sell coloring pages of your work. You can sell them as printable files or as actual pages that you mail. And if you license your work, and have a nice selection of black and white line versions of your artwork, consider approaching a rubber stamp company. They use these black and white versions to create their rubber stamps.

I also want to add that my art is stylized. So I have a hard line in all my art. This technique of printing the lines on your paper works best for that type of style. If you don't have hard lines in your work, you may end up seeing the printed lines in your final painting and there's no way to get rid of them if you're using watercolors. But this is also a nice technique for acrylic artists or any other medium that would hide these lines that you're printing out.

Ok, so that's all great, but you're probably asking...how do you do it! Well, I'll try my best to show you how. Let me start by saying that there are probably much better tutorials out there for what I'm going to show you with people that have much more knowledge than I have. But I've been doing it this way for awhile and it works for me, so I figured you all might enjoy seeing how I do it! To be able to do this tutorial, I think at least intermediate knowledge of Photoshop would be helpful.

Step One: Create a Sketch

You have to have a sketch to start this whole process. I prefer the old paper and pencil approach. I have just never gotten used to sketching with a stylus in Photoshop directly. But if you like to sketch in Photoshop, by all means go ahead. You just need a sketch of any variety to move on to the next step.

For this tutorial, I will be using a mermaid sketch that I finished awhile back:


You can see that I did try and make the sketch as clean as possible. It is important to know exactly where you want all your lines to go. It will save you a lot of headache later on. Trust me! But there are also some smudges and some lines in there that won't make it to the final version. But that's ok. We will clean that all up. Just know in your mind what lines you want and which ones you don't.

Step Two: Setting Up Your Photoshop File

You need to scan in your sketch first. I recommend scanning in at 300 dpi to create a nice high resolution version of your sketch.

Then, make your Photoshop file where you will create your line work. All of my line work files are 8 inches by 10 inches and 600 dpi. I like to go larger with the dpi if possible and if your computer can handle it. At the very minimum, you need to have 300 dpi. But I like to go larger so that I have more options.

Next, set up your layers so that your sketch is the 2nd layer from the bottom. Your bottommost layer needs to be plain white. Here is a photo of what my workspace looks like when I first get started.


Also, I would recommend lowering the opacity of the sketch layer by 50% so that you can still see the sketch easily, but you will be able to focus on the line work you're creating in Photoshop better.

Step Three: Use the Pen Tool to Create Line Work

Next, lock the background layer and your sketch layer. You want your line work to be separate from these layers. It's best to lock to them so you have no chance of combining the layers. It's a nightmare to try and separate them, so be careful with that part!

And then create a new layer where your new line work will be. Select the Pen Tool and select Paths at the top. If you've never worked with paths, I might recommend searching for a step by step tutorial on how to use paths. Honestly, it just takes a lot of practice to get used to how to use them. It's still challenging for me at this point sometimes.

Basically, you create anchor points by clicking on different points of your lines. Then little handle bars pop up that you can adjust to create the curve in between two anchor points.

At this point, I usually zoom into my piece between 100-300% so I can really see what I'm doing. Right now, I'm working on a curve in her hair. I left clicked my first point and then left clicked and dragged slightly to create my second anchor point. When you left click and drag it creates the handle bars. This picture shows where I initially put the two points and the line in between:


But you can see that the line isn't quite where I want it, so I need to use the handle bars to adjust it. You hold down control and left click+drag to move the handle bars around. This is really the part that takes practice. You need to learn where to place your points and how to adjust the lines. You can see in this next photo that I've moved the line into position of where I want it:


At this point, you have the path, but you need the actual black line. So you need to stroke your path. What you do is select the brush type and thickness you want to use. I use a regular round brush size 5. But you can use whatever you'd like. Then click the Paths tab in your Layer window. Then at the bottom of the window, there's a button that says "Stroke Path with Brush." Hit that button and it will stroke your line.


After that, I usually delete my path, because it just gets in your way. That was a simple line that only had two anchor points. Sometimes you have to create a line that has multiple anchor points. I suppose technically, you could create the entire line work in one path, but I prefer breaking it up into lines. That just makes it easier for me. You can see with this next line, I'm working on some of the scroll work. Extreme curves like this scroll work, are often the most difficult to get right. You sometimes get these pointy areas that area really annoying. But with practice, it becomes a lot easier. I created this scrollwork with 9 anchor points.


Then stroke it and delete the path.

That's basically it! You just continue to go through all of the line work and build up the piece as you go.

Here is a useful thing to keep in mind:

Alt click an anchor point to create a "hard turn" in the curve. I'm sure there's a technical term for this, but it's just not coming to me right now. You can see in this next picture, that I want the curve to kind of stop and start again at this junction:


So I simply Alt+Left Click that anchor point and it makes a nice hard turn in the curve.


Next, I will jump ahead to the completed piece. I will use another one of my pieces that I finished as this mermaid one is not done yet. =)

Here is the completed line work of a witch piece I did awhile ago called Ashlyn:


Step Four: Preparing Your Image for Printing

Once you get to this point, you simply hide or delete your sketch layer and then you're left with a nice clean version of your artwork!


Next, you want to print this version on your final watercolor paper. So figure out what size paper you're going to put in your printer. I recommend not printing borderless. I would leave space all the way around your painting so that you can tape off your paper. For instance, this linework measures 8x10", but I would put a piece of paper that's 8.5x11" into my printer. Here's what my file looks like when it's ready for printing:


You can see that my paper measures 8.5x11", but the image is only 8x10." I then add a line around the image so that when I'm taping/painting, I know exactly where the end of the painting should be and I don't end up with any blank spaces that should be colored. I usually tape down my pieces and use the line as a guide. You may also notice that I decreased the opacity of the lines. It's important to get the lines as light as possible so that you don't have any chances of them showing through on the final version if you're using a medium like watercolor.

Step Five: Print, Tape, Ink and Paint!

Next, you just load up your watercolor paper in your printer and print it out. You need to make sure that your printer will allow for a thicker paper like watercolor paper. Some do, some don't. Make sure you check before you try to feed through a thick paper! I recommend printing with a photo setting so that your lines are nice and crisp. If you print with a lower setting, sometimes the lines get distorted. You don't want it to be too light so you don't know where to ink.

After this, I tape down my painting and start inking! I use a waterproof brown ink with a dip pen. Here's a picture of what Ashlyn looks like midway through the inking process:


You can see the very faint lines that I printed off and then the brown lines are what I have inked by hand on the painting. Then, you just continue inking and painting until it's complete!


Now, we're finished! I hope you enjoyed that step by step process of how to create clean line work in Photoshop. I really hope that it will help you in some way in your painting process! =)

Monday, April 9, 2012

Naming Contest - New Mermaid Sketch!

I have a new mermaid sketch that needs a name! I originally posted this sketch about a month ago, but I finally have the time to turn her into a finished painting. This new sketch features a graceful mermaid with some intricate shell, wave and bubble designs! I really hope that you all enjoy her. =)

Most importantly...she needs a name! Please post your name suggestions below along with your email addresses so I can contact you if you win. I have allowed anonymous posts so that those of you with no accounts can still post, but please make sure to post your email address so that I know who to contact. Anyone is welcome to participate! And feel free to post as many names as you'd like.

The person who suggests the name I pick will win a 5x7" print of the finished piece. You can make suggestions up until I post the clean line version of the sketch and that's when I will announce the winner. I don't have an exact time, but it will probably be in a couple days, so make sure to get in your suggestions soon!

I'm really looking forward to working on this painting. I'm thinking that I will paint her in shades of teal, purple and brown. I think it will look really pretty! I'll be sure to keep you all updated on my progress and thanks in advance for all the name suggestions. =)

A New Year, A Niece, MegaCon 2012 and A New Home!

Wow! I can't believe I haven't even made a blog post yet this year. There have been a lot of big changes in my life since the start of the new year, so I thought I'd take a moment and fill you all in about what's been going on!

The first bit of news I wanted to share is what I'm most excited about....I'm going to be an aunt!! My sister and her husband are pregnant with their first child. My sister is due at the end of June and I'm so excited to meet my little niece!! This is the first baby in our family and we all couldn't be more thrilled. I can't wait until she's here and I can spoil her! I'll be sure to let you all know when she arrives and hopefully show you a few pictures. Here is a picture of my beautiful sister!!


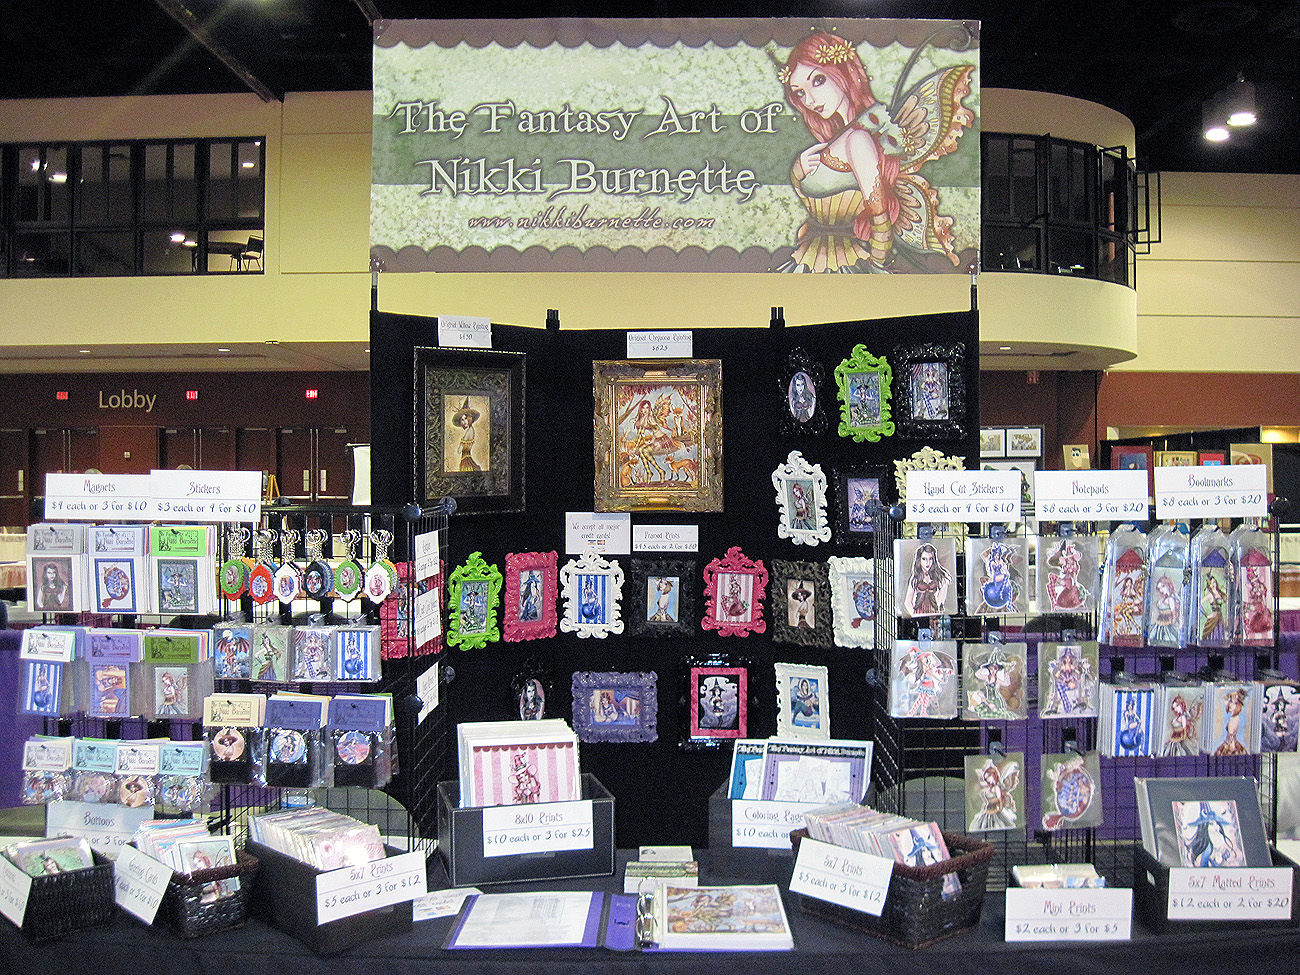
Another really exciting event for me so far this year was MegaCon 2012. After the holiday rush, I began prepping for the show. I have done a few shows in the past, but haven't ever done one as big as MegaCon. It's a Sci Fi/Fantasy Convention in Orlando, Florida that has thousands and thousands of attendants over a 3 day period.

My husband came down to help me at my booth and it was so much fun and a big success! I had an 8 foot table which was quite a change from what I was used to. I have had 10'x10' tents at all my shows this past year, so I had to try and figure out how to condense my setup down to that space. I think it turned out very well though!


My favorite part was getting to meet everyone that came to my booth. And the costumes were of course fantastic! Here are a few pictures of some of the people who came to buy things from my booth in their costumes! I hope you enjoy them. =)


And lastly, probably the biggest change since the start of the new year, my husband and I moved from Atlanta, GA to Columbus, OH! It was very last minute and unexpected, but also very exciting. We found out we were moving the 2nd week of March, we packed up our whole home and moved to our new home on March 31st!

It was a little challenging getting everything ready in such a short amount of time and the logistics of everything was overwhelming at times, but all things considered, the move went very smoothly!! We had so much help from family and friends that we're so thankful for.

Our new home is just wonderful! We love it and the area that we're in. One of the best parts of the move is that I'm going to have about 3 times as much time as I've had in the past to work on my artwork!! So expect to see much more frequent updates from me, more sketches, many more original pieces, more Facebook auctions, Etsy listings and more!! I also plan on updating my blog much more often, so stay tuned for that. I really couldn't be happier!

Saturday, December 24, 2011

Holiday Giveaway Winner!

Congratulations to louisamay29!! You have won my holiday giveaway! You will receive 20 5x7" prints!! 4 of them will be my holiday themed pieces: Shanna, Elana, Neva and Belle. You can also choose any 16 additional 5x7" prints from my gallery here (excluding the dryad). Please contact me at nikki@aurella-art.com to claim your prize!

I randomly selected the winner by putting all the names into a hat and drawing one. The recipes you gave (all so delicious!) had no weight on who won the contest.

Thank you so much to everyone who participated in the giveaway! Please keep an eye on my blog because I will be having more in the future for sure. Merry Christmas and Happy Holidays to everyone! And thanks so much for all of your support of my artwork this year. =)

Monday, December 12, 2011

Holiday Giveaway - Share Your Favorite Holiday Recipe and Win 20 5x7" Nikki Burnette Fantasy Art Prints!!

Thanks to a very kind donation from a very special person, I am having a HUGE holiday giveaway again this year! This is always a time of year where I like to give back to all my fans who support me throughout the year. I try to have a giveaway each year, but thanks to a generous donation I can make this year even bigger and better!

How To Enter:

This giveaway will take place on my blog. All entries must be posted underneath this blog post to be considered for the contest. If you don't have an account with which to post with, I have allowed annonymous posts, but please list your name and email address so I know who to contact if you win!

To enter, simply post your favorite holiday recipe below! You can either post the whole recipe or link to another site where your favorite recipe is located. If you're not big into cooking and recipes, just tell me what your favorite holiday treat is. No need to get super descriptive if you don't want to. A simple "sugar cookies with sprinkles" is just fine with me. I thought this might be a really fun way to exchange recipes and yummy holiday treat ideas!

What You Win:

The person who wins this giveaway will receive TWENTY of my 5x7" prints!! This giveaway's retail value is $160!! Not only is it a great value, but it's a fantastic way to expand your art collection or start a new collection. I really love the 5x7" print size because they look so good displayed together in a grouping on a wall.

You will receive all FOUR of my holiday themed prints including: Shanna, Elana, Neva and Belle. Then for the remaining 16 prints, you can choose any ones that you want! You can pick from my entire gallery here.

Deadline:

You have from now until December 23rd at midnight EST to enter! On Saturday, December 24th, I will announce the winner. The winner will be chosen randomly. Your recipe or what you write will have no bearing on who wins the contest. I will write all the names down and choose one from a slip at random! Your items will be shipped the first week of January 2012.

In the top right hand corner of your screen, there should be a box that says "follow by email." If you type your email address in that box, you will receive a notification when I announce the winner! You will also receive notifications when I make other blog posts, so you can stay up to date with other contests, giveaways and news about my art!

Thanks to everyone who supports my artwork! Your support means the world to me and I am just so thankful for all of my friends and fans. I hope you enjoy the giveaway and have a wonderful holiday season!

Belle

Elana

Neva

Shanna

Facebook Auction - Original Shanna Sketch + 8x10" Signed Print

This auction starts now and will last until Tuesday 12/13 at 7:00 PM EST. ONLY BIDS ON MY FACEBOOK FAN PAGE AUCTION WILL BE ACCEPTED - WHOLE DOLLAR AMOUNTS ONLY. CLICK ON THIS LINK TO BE TAKEN TO THE AUCTION.

This auction will include the following:

~Original Shanna Sketch - This sketch measures approx. 8.5x11." It is signed, titled and dated and comes in a plastic sleeve with a backing board. Shanna is one of the very first holiday pieces that I've painted and my only holiday mermaid at the moment! I painted this way back in 2007 and have since sold tons of prints and products with this image as well as licensed her to many different companies. This is your chance to own the original sketch that painting was based on!

**Please note: This is a -sketch- not a finished drawing. There are smudges and messy lines! This sketch was created on a piece of drawing paper.

~8x10" Signed Print of Shanna - This auction also includes an 8x10" print of the finished piece! The actual piece of paper measures 8.5x11" which leaves a small white border. I've signed and titled the piece in the white border.

Simply type the amount you'd like to bid below. There will be no minimum bid requirement, so it should be very fun!

I can accept payment through Paypal. I will send an invoice via email to the winner of the auction through Paypal which is super easy to use.

These items will be shipped via USPS First Class Mail
US Destinations: $3.75
Canada Destinations: $4.75
Everywhere Else: $9.00

Thank you and happy bidding! =)