Sunday, June 10, 2012

Cheyanna - Fox Fairy Watercolor Painting - Step by Step Process

I thought it might be fun to make a new blog post every time I finish a painting to show my step by step progress photos in one easy to view place. I always post these as I'm painting on my Facebook Fan Page, but thought I'd share them in my blog as well! I'll give just a little description to try to explain my process as I'm painting. I hope that you all enjoy them!

This piece is Cheyanna, my fox and fairy painting. I painted this at the beginning of 2012. She is an 11x14" watercolor and ink painting. The original is still available for sale here! And you can also purchase prints and products of this image in my Etsy store here.

This is my initial sketch for Cheyanna. I always sketch everything out at first with good old paper and pencil!
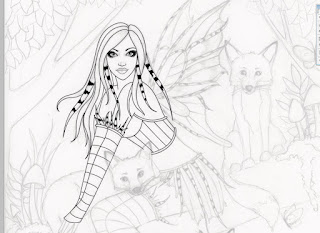
Next, I start to create the linework in Photoshop to create nice clean and crisp lines. I use these for the final watercolor painting, for rubber stamps and for my coloring pages that I sell.

I use the pen tool in Photoshop and generally start on the eyes and face first to make sure I get them correct.

More work on the fairy shown here without the sketch behind her.

Started on the leaves and the fox face. So many lines!
Completed linework for Cheyanna.

Now this is the actual watercolor painting. I printed the linework very lightly on the final watercolor and re-inked the entire piece with brown ink and a dip pen. Then I start painting in watercolors. I generally always start on the background first. Here, I used a napkin to blot out areas of color to create the look of foliage in the background without having to paint every little leaf or bush.

You can see that I often work on the same colors at the same time. For instance, I had the same colors of brown and gold in her clothing as I had in the leaves. So I work on them at the same time so that I don't have to mix all the same shades of color twice. It's a good time saver!

In the previous picture, you can see that I was painting and not worrying about blending much. I usually just paint the color gradually on the painting and then blend at the very end. I take a big soft brush dipped in water and use it to blend all of the paint that I've added. This is another time saver as well.
Here I'm starting on the red shades. They always look slightly pink when first getting started. It takes many layers to build up a nice deep red color.
Finishing up the red tones in this photo.

Starting on the trees in this photo. It's important to build up texture towards the beginning of the process. If you wait until you add too much color, you lose too much of the natural whiteness of the paper and it's nearly impossible to generate some sort of a texture without a lot of lifting or white acrylic.

Starting on the foxes and finishing up the trees. You can see I went really dark on some areas of the tree using black. I really like this look as it creates deep grooves and crevices in the tree.

Nearly done!

This is the completed piece!


No comments:

Post a Comment